Thursday, 28 May 2020

Basic Things to take care when Upgrading from Codeigniter- 3 to Codeigniter-4

Now a big hurdle for all codeigniter developers around the world is to change their projects from CI-3 to CI-4. Now Codeigniter team has changed there formats and structure in such a way that , developers cannot auto-update just  their versions from 3 to 4. They have to manually edit the code and make changes to the code. . So in this article I am going to explain about some of the basic differences in calling functions between the two versions. Here am giving some examples only. For detailed project code and examples, am going to write another post for that in the coming days. For having a peek overview on the changes have a look into these points explained. iam sure someone will get benefit from this article.

1) Folder Structure

Codeigniter-3 

In codeigniter-3, we have a folder called application, under which all the config, controllers, models, views is placed . In this version codeigniter doesn't restricted us for putting our css, js in any folders. Instead we can place it in any folders in the root and we can access it from our views.

Codeigniter-4

In Codeigniter-4, the application folder has been renamed as app. Now there is a folder called public, in it now we have to put all our css, js and all. Now when we access base_url from the views to access this public folder. This feature, Codeigniter team created mainly for security purpose, so that anything outside the public folder cannot be accessed by intruders. Another thing  in this versionis the usage of too many namespaces. so we can access all folders in root in our models and controllers by defining the namespaces. 

2)Routing

Codeigniter-3

Route File is found in application/config/routes.php

$route['cms/list'] = "cms/list";
Here when request comes for domain.com/cms/list/ it will redirect to CMS controller and run the list method in it.
$route['cms/edit/(:any)'] = "cms/edit/$1";
Here when request comes for domain.com/cms/edit/3 , it will redirect to CMS controller and run edit method in it . then passes $id argument into it.

Codeigniter-4

Route File is Found in app/Config/Routes.php

$routes->add('cms/create/', 'Cms::create');
Here you can see route file configuration is little changed. Here Controller,method is designated as Controller::method format  and another change is you have to mention the submission method. If you see, this is actually a  a add form, so you have to create method for accepting post requests. For post methods, we have to do like adding $routes-> add(). For get method please refer for cms/list down.

$routes->add('cms/edit/(:any)', 'Cms::edit/$1');

Here when the request comes for domain/cms/edit/3 , it will call the CMS controller and execute edit function in it passing the $id as parameter.As edit also is a form, which is submitting post parameters, we have to define it as Post function in the route. so we will add as $routes->add();

$routes->get('cms/list/', 'Cms::list');

This is a list function. It is taking only get arguments. so we will configure it as a get method in the route. So we have to add the rule like $routes->get(). So when request comes for domain.com/cms/list/, it will call the CMS controller and execute the list function defined in it.


3) USING CUSTOM NAMESPACES

This is one of the mighty enhancements done by the Codeigniter community in the new version. AS you know Codeigniter 4 is compatible with php version above 7. so it is utilizing the namespace feature of it abundantly in its new version.

Codeigniter 4

You can define your custom namespaces in app/Config/Autoload.php

If you open that particular file,you can see a array called $psr4. You have to add your namespaces there.

For eg:-

$psr4 = [
'App'         => APPPATH,              
APP_NAMESPACE => APPPATH,             
'Config'      => APPPATH . 'Config',
'IonAuth' => ROOTPATH . 'ion-auth-4',
                       'Admin'   => ROOTPATH . 'ci4-admin',
                       'Myapp'   => ROOTPATH . 'app',
];

You can see in the above configuration, i have defined some namespaces like Ion-Auth, Admin,Myapp .etc. What I am doing is assigning the path of those modules to that name. So I can access the controller,models,views in those folders just by using those static names.

For eg:- If am writing below line in any of my controller:-

echo view('Admin\Views\admin_template\admin_mainheader', $data);

System will identify Admin\ as a namespace and it will replace it with the path defined in namespace. so whatever included in that path will be executed. This gives a large advantage when we design our application.


4) DEFINING CONTROLLERS & MODELS

Codeigniter-3

In Codeigniter 3, we used to define controllers like:-

class Cms extends extends CI_Controller {

}

Controller class was extending CI_Controller Class.

we used to define models like:-

class Cms_model extends CI_model {

}

Model class was extending CI_model.

Codeigniter-4

In CI-4 this scenario is completely different.

In controller we have to define like:-

<?php

namespace App\Controllers;
use CodeIgniter\Controller;
use App\Models\Modelname;

class Cms extends Controller {

}

?>

Here we have to include Controllers in the top as namespaces. Also have to include models by defining it like this Use App/Models/Modelname. This place you can make use of the custom namespaces we saw above to include your models.

<?php
namespace App\Models;
use CodeIgniter\Model;

class CmsModel extends Model {
}
?>

Same like controllers, we have to define namespace paths for the models and include them. Here model is going to extend the model class instead of CI_model.

5) LOADING LIBRARIES,HELPERS.etc.

Codeigniter-3

        $this->load->database();       
        $this->load->library(['ion_auth', 'form_validation','pagination']);
        $this->load->helper(['url', 'language','form']);
In the previous version, we were loading database, library, helpers and models like this. Just check below how in the CI-4 version, everything is loading.

Codeigniter-4

     $db = \Config\Database::connect();
    $this->ionAuth    = new \IonAuth\Libraries\IonAuth();
    $this->validation = \Config\Services::validation();
    helper(['form', 'url','string','text']);
    $this->session       = \Config\Services::session();
    $pager = \Config\Services::pager();

Here Everything is loading differently. Just check the differences in both calling methods.

6)LOADING MODELS

Codeigniter-3

$this->load->model('cms_model');
$totalrecords= $this->cms_model->get_allrecord();

this is how model was loading and calling functions in the CI-3 Version. Loading the particular model by calling $this->load(->model() function. then calling particular function defined using $this->modelname function() . Now we will check how this is acheived in Codeigniter-4.

Codeigniter-4

Here we have to first include  path to the Model in top of controller before calling it..

use App\Models\CmsModel;

then to create object for the model. we have to declare like this-

$cmsmodel = new CmsModel();

then for calling the function:-

$totalrecords= $cmsmodel->get_allrecords();

Here you can see we are calling the function by using the object declared above. 


7) GET & POST VARIABLES ACCESSING

Codeigniter-3

Accessing Post variable from form submission
$keyword=   $this->input->post('keyword');
Accessing GET variables
$keyword=   $this->input->get('keyword');

Codeigniter-4

Accessing POST variables
$keyword= $this->request->getPost('keyword');
Accessing GET Variables
$keyword=$this->request->getVar('keyword');

8) FORM VALIDATION RULE SET

Codeigniter-3

  $this->form_validation->set_rules('txtMenuTitle', 'Title', 'trim|required');
  $this->form_validation->set_rules('txtParent', 'Parent', 'trim|required');

Codeigniter-4

  $this->validation->setRule('txtMenuTitle', 'Title', 'trim|required');
  $this->validation->setRule('txtParent', 'Parent', 'trim|required');

If you clearly notice you can see there are some minor changes only. form_validation chnaged to validation and set_rules changed to setRule.


9)PAGINATION

Codeigniter-3
    $searchstring='&keyword='.$keyword;
    $config['base_url'] = $data['urls'].'/auth/cms/list';
    $config['suffix']=$searchstring; // passing the search strings
    $config['total_rows'] = $data['count'];// total count of records fetched
    $config['per_page'] = $per_page_records; //count wanted per page
    $config["uri_segment"] = 2;         
    $config['first_url'] = $config['base_url'] .'?'. $config['suffix'];     
    $config['full_tag_open'] = "<ul class='pagination pull-right no-margin'>";
    $config['full_tag_close'] = '</ul>';
    $config['num_tag_open'] = '<li>';
    $config['num_tag_close'] = '</li>';
    $config['cur_tag_open'] = '<li class="active"><a href="#">';
    $config['cur_tag_close'] = '</a></li>';
    $config['prev_tag_open'] = '<li>';
    $config['prev_tag_close'] = '</li>';
    $config['first_tag_open'] = '<li>';
    $config['first_tag_close'] = '</li>';
    $config['last_tag_open'] = '<li>';
    $config['last_tag_close'] = '</li>';
    $config['prev_link'] = '<i class="ace-icon fa fa-angle-double-left"></i>';
    $config['prev_tag_open'] = '<li class="prev">';
    $config['prev_tag_close'] = '</li>';
    $config['next_link'] = '<i class="ace-icon fa fa-angle-double-right"></i>';
    $config['next_tag_open'] = '<li class="next">';
    $config['next_tag_close'] = '</li>';
    $config['use_page_numbers'] = FALSE;
    $config['enable_query_strings'] = TRUE;
    $config['page_query_string'] = TRUE;
    $config['reuse_query_string'] = FALSE;
    $config['attributes'] = array('keyword' =>$keyword);
    $config['attributes']['rel'] = TRUE;

    $this->pagination->initialize($config);// initializing the configs 
    $data['pagelinks']= $this->pagination->create_links();//creating links

Here it was like setting all your configuration into the config variable and then passing it to the initialize function, then the pagination class will be auto creating links for you which you will call in the view. Also please note that you can pass the search variables through suffix variable in the config.

Codeigniter-4

 if($keyword!=''){
         $cmsmodel->like('title',$keyword);
         $cmsmodel->orlike('page_title',$keyword);
       }
       
        $data['records']=$cmsmodel->paginate($per_page_records);
        $data['pager']=$cmsmodel->pager;

Here they removed the $config settings procedure. here we just have to call the paginate method on the particular model. Search parameters you can pass just like data fetching way. If you have more search parameters, you just have to append it in the $model->where() or $model->like type of functions. Now in the view you just have to call like:-

<?php  echo $pager->links(); ?>

This will display all the pagination links in the view page. You can further customize these links or pagination style using advanced ci-4 functions codeigniter is providing. Just refer their documentation for more details.

10) CALLING MODEL FUNCTIONS IN VIEWS

Codeigniter-3

<?php
$ci =&get_instance();
$ci->load->model('cms_model');
$record=  $ci->cms_model->getdetails($id);
?>

Sometimes we will be having requirement to call a particular Model function inside view itself. In those scenarios we can call that method in the view using instance function as described above

Codeigniter-4

In CI-4, its is more simple we have to just create an object in the controller method and just pass the object to the view. From there, we can call that particular method from model using the object.

So In Controller define like:-
<?php
 $cmsmodel = new CmsModel();
$data['cmsmodel']=$cmsmodel;
?>
Pass it to the view. then in View, just call the function.
<?php
  $record=  $cmsmodel->getdetails($id); 
?>

11) LOADING VIEWS IN THE CONTROLLER FUNCTIONS

Codeigniter-3

$this->load->view('cms/list', $data);

Just we have to call the view page by using $this-.load->view method.

Codeigniter-4

echo view('cms\admin_list', $data);

In CI-4 , it is more simplified and we have to just pass view file path to view() function.
For view file lying in other folders outside the app folder. You should define namespaces for them and call them like:-

echo view('Admin\Views\admin_template\admin_mainheader', $data);

12) CONFIGURING MODELS

Codeigniter-3

<?php
class Cms_model extends CI_model {
 
 protected $table = 'cms_pages';

        public function __construct()
        {
                $this->load->database();
        }

      public function functionname()
     {

     }
}
?>
Defining models by extending CI_Model class. Then defining $table in the proteted variable, so can us it all the functions coming under the model. In construct method, loading the database. Then defining each and every functions under it. This is how we did in CI-3.

Codeigniter-4

<?php
namespace App\Models;
use CodeIgniter\Model;

class CmsModel extends Model {
 
 protected $table = 'cms_pages';
 protected $primaryKey = 'page_id';
 protected $allowedFields = ['order','level','parent','position','published','default','featured','title','page_title','content','banner','date_update','seo_title','seo_keywords','seo_description','seo_slug'];

      
        public function get_records() {
 
    }

?>
Here in model, first you have to include namespace path. Then include codeigniter model file. Then define the Model extending Model class. Now here these 3 fields are almost mandatory to put. Sometimes codeigniter doesnt allow saving data without these variables defined in the model.

13) BASIC MODEL FUNCTIONS 

Codeigniter-3

-Insert

$this->db->insert($this->table, $data);

-Update

  $this->db->where('page_id', $id);
   $this->db->update($this->table,$data);

-Delete

  $this->db->where('page_id', $id);
  $this->db->delete($this->table);

-Retreive 
           $this->db->where('id',$id);
        $query = $this->db->get($this->table);
        return $query->result_array();

-Get Last Insert ID

$this->db->insert_id();

-Getting DB error Messages

$this->db->getErrorMessage();


Codeigniter-4


-Insert

$this->insert($data);

-Update

$this->update($id, $data);

-Delete

  $this->delete($id);

-Retreive 

$rec = $this->where(array('level' => '1'))->findAll();

-Get Last Insert ID

$this->insertID();

-Getting DB error Messages

$this->error();

If you watch closely you can see all function calling have been simplified a lot.


Monday, 17 February 2020

International Exchange Rate Integration to PHP Website

When we are developing  Ecommerce website for international customers, sometimes we want to show item prices in their local currencies. So to update all country currency manually is not a feasible task. So we have to look for some automated way to do this thing. I will explain steps need to taken for doing the same.

1) First thing we have to do is to fix a Base Currency for our website. Its better to put USD as abse currency since it is not fluctuating very much. So you dont have to worry about your items prices every time..

2) You should have a currency rate table in your database. Its fields should be Currencycode, Formal name, rate .etc.. If you need help creating.. download below sql file and export it. Suppose the table name is currency.
https://github.com/litto/Currency-Mysql-table

3) Now create a cron php file named update_exchangerate.php in your server.

4) Copy below code into that file and use yoor own functions for database operations

 $rss = new DOMDocument();
 $rss->load('http://www.floatrates.com/daily/usd.xml');
 $feed = array();
 foreach ($rss->getElementsByTagName('item') as $node) {

  $item = array ( 
   'baseCurrency' => $node->getElementsByTagName('baseCurrency')->item(0)->nodeValue,
   'targetCurrency' => $node->getElementsByTagName('targetCurrency')->item(0)->nodeValue,
   'exchangeRate' => $node->getElementsByTagName('exchangeRate')->item(0)->nodeValue,
   );
  array_push($feed, $item);
 }
 $limit = count($feed);
 for($x=0;$x<$limit;$x++) {

  $baseCurrency = $feed[$x]['baseCurrency'];
  $targetCurrency = $feed[$x]['targetCurrency'];
  $exchangeRate = $feed[$x]['exchangeRate'];
  
    $result = mysql_query("SELECT *  FROM  cms_currency  WHERE `name`='$targetCurrency'", $link1);
    $productdet=fetchquery($result);
    if(count($productdet)>0){
    $currency_id=$productdet[0]['id'];
    if($currency_id!='' || $currency_id!=0)
    {

$inputs1 = array('conv' => $exchangeRate);

updatequery($inputs1,"cms_currency","id='$currency_id'",$dblink);

    }

  }

 } 

5) You can set this file to run as cronjob as frequent as you want.. so it will update the current rates .
If you have linux hosting you can go to Cpanel. Go to advanced section. Click on Cron Jobs. Add a cron job by selecting once per day. Select the hour you need to update.

Command update as wget https://www.website.com/cron/update_exchangerates.php


Wednesday, 29 January 2020

Google Analytics API Integration to PHP website

Google Analytics is an integral part of  all websites right now. The main benefit of integrating it with our website is knowing our audiences better. We can know which location they are from, which device they are using, which pages they are visiting.etc...  In normal process, we will get an analytics dashboard from google itself to browse through the analytics datas and graphs. But sometimes  we will be having a requirement, where we have to show those data into our websites dashboards. In this scenario we have to integrate the API with our website.


STEPS FOR CREATING API ACCOUNT ( From Google Developer Docs)

To get started using Analytics Reporting API v4, you need to first use the setup tool, which guides you through creating a project in the Google API Console, enabling the API, and creating credentials.

  1. Open the Service accounts page. If prompted, select a project.
  2. Click add Create Service Account, enter a name and description for the service account. You can use the default service account ID, or choose a different, unique one. When done click Create.
  3. The Service account permissions (optional) section that follows is not required. Click Continue.
  4. On the Grant users access to this service account screen, scroll down to the Create key section. Click add Create key.
  5. In the side panel that appears, select the format for your key: JSON is recommended.
  6. Click Create. Your new public/private key pair is generated and downloaded to your machine; it serves as the only copy of this key. For information on how to store it securely, see Managing service account keys.
  7. Click Close on the Private key saved to your computer dialog, then click Done to return to the table of your service accounts.

Add service account to the Google Analytics account


The newly created service account will have an email address that looks similar to:

quickstart@PROJECT-ID.iam.gserviceaccount.com

Use this email address to add a user to the Google analytics view you want to access via the API. For this tutorial only Read & Analyze permissions are needed.
2. Install the client library
You can obtain the Google APIs Client Library for PHP using Composer:
composer require google/apiclient:^2.0
Refer:- https://developers.google.com/analytics/devguides/reporting/core/v4/quickstart/service-php
3.  Now all our libraries has been downloaded. But for fetching data, we should know how to call classes and functions. For attributes and responses you can refer to this library:-

4.  In this post, I want to make the developers job very easily. I have developed a package where you can just call functions and you will get the data you need. Please download my package from Github.


My Further Explanation will be based on this.

In my package there is a  File called  AnalyticsFunc.php, I have included all the functions in this file based on my research of Google analytics API. 
One thing You have to do is replace two values in those files:-

1) Find $KEY_FILE_LOCATION = __DIR__ . '/credentials.json'; Line in the initializeAnalytics() function and change the json file name to the file name you downloaded from google developer console. You have to include that file in the root folder.

2)In Every Function, there is a line called  $VIEW_ID = "YourID";. here you have
to provide your view id of that particular project from google analytics
dashboard.

You just need to call the functions like below:-

<?php

//Including Files and Libraries

require_once __DIR__ . '/vendor/autoload.php';
include("AnalyticsFunc.php");

//Initiliazing Analytics Object
$analytics = initializeAnalytics();

//Calling User Reports Sessions and page views
$userreport = getUserReport($analytics);
$records=fetchResults($userreport);
?>

Above is a sample code for calling user reports sessions. You will get result in an array format, which you can use for generating graphs, charts and tables.

For calling all functions until initializing Analytics objects will be common. The functions part you can call any functions as per your Requirement.  I will list all the functions down here.

$sessionreport = getsessionReport($analytics); // Get all Session Data
$traffic = gettrafficsources($analytics); //Get  all Traffic Sources
$platform = getplatformreport($analytics); //Get all Platforms Data
$geonetwork = getgeonetworkreport($analytics); // Get all Location Reports
$social = getsocialreport($analytics); //Report on Social activities
$pagetracking = getpagetrackingreport($analytics); // Report on Page Tracking
$internalsearch = getinternalsearchReport1($analytics); // Get Internal Search reports
$speed = getspeedReport($analytics);// Get Page Speed Report
$socialinter = getsocialinteractionReport($analytics); // Get Social Interaction reports


Sunday, 26 January 2020

Integrating Google Authenticator (2 Factor Authentication) into your PHP Website


What is Two Factor Authentication?

Two Factor Authentication, also known as 2FA, two step verification or TFA (as an acronym), is an extra layer of security that is known as “multi factor authentication” that requires not only a password and username but also something that only, and only, that user has on them, i.e. a piece of information only they should know or have immediately to hand — such as a physical token.

How Google Authenticator works?

Google Authenticator is a free app for your smart phone that generates a new code every 30 seconds. It works like this:
When enabling 2FA, the application you’re securing generates a QR code that user’s scan with their phone camera to add the profile to their Google Authenticator app.
Your user’s smart phone then generates a new code every 30 seconds to use for the second part of authentication to the application.

Implementing Google Authenticator on your website using PHP

For implementing we have to do two steps.


1) User have to scan a barcode and authenticate the two factor authentication. So the secret we will save in a field of our database table. Practically in our live project. suppose you have a table called users in your database. You may be saving all user details like name,email,phone,password all in that table. You have to create 2 fields in that. one field is to check whether user want 2FA or not. so You can set a variable called "2fa_enable" and set as INT or Boolean. so values will be 1 for enabling, 0 for disabled. The second field will be "auth_secret". This field you can create as VARCHAR. It will save all aphanumerals, which will be used to save the secret generated during the authentication.


2)Next step is veryfing the code after the login process. In this step we will check the string enetered using the google authenticator app to the string created using the secret saved in our database. If both matches we will redirect to accessing pages otherwise login will be failed.


Implementing in the Project

1) We are using Authenticator Library for this.  Make a php file named Authenticator.php ad copy paste the below code.

<?php


class Authenticator
{
    protected $length = 6;
    public function generateRandomSecret($secretLength = 16)
    {
        $secret = '';
        $validChars = array(
            'A', 'B', 'C', 'D', 'E', 'F', 'G', 'H', 
            'I', 'J', 'K', 'L', 'M', 'N', 'O', 'P', 
            'Q', 'R', 'S', 'T', 'U', 'V', 'W', 'X', 
            'Y', 'Z', '2', '3', '4', '5', '6', '7', 
            '=',
        );

        // Valid secret lengths are 80 to 640 bits
        if ($secretLength < 16 || $secretLength > 128) {
            throw new Exception('Bad secret length');
        }
        $random = false;
        if (function_exists('random_bytes')) {
            $random = random_bytes($secretLength);
        } elseif (function_exists('mcrypt_create_iv')) {
            $random = mcrypt_create_iv($secretLength, MCRYPT_DEV_URANDOM);
        } elseif (function_exists('openssl_random_pseudo_bytes')) {
            $random = openssl_random_pseudo_bytes($secretLength, $cryptoStrong);
            if (!$cryptoStrong) {
                $random = false;
            }
        }
        if ($random !== false) {
            for ($i = 0; $i < $secretLength; ++$i) {
                $secret .= $validChars[ord($random[$i]) & 31];
            }
        } else {
            throw new Exception('Cannot create secure random secret due to source unavailbility');
        }

        return $secret;
    }


    public function getCode($secret, $timeSlice = null)
    {
        if ($timeSlice === null) {
            $timeSlice = floor(time() / 30);
        }

        $secretkey = $this->debase32($secret);

        $time = chr(0).chr(0).chr(0).chr(0).pack('N*', $timeSlice);
        $hm = hash_hmac('SHA1', $time, $secretkey, true);
        $offset = ord(substr($hm, -1)) & 0x0F;
        $hashpart = substr($hm, $offset, 4);

        $value = unpack('N', $hashpart);
        $value = $value[1];
        $value = $value & 0x7FFFFFFF;

        $modulo = pow(10, $this->length);

        return str_pad($value % $modulo, $this->length, '0', STR_PAD_LEFT);
    }


    public function getQR($name, $secret, $title = null, $params = array())
    {
        $width = !empty($params['width']) && (int) $params['width'] > 0 ? (int) $params['width'] : 200;
        $height = !empty($params['height']) && (int) $params['height'] > 0 ? (int) $params['height'] : 200;
        $level = !empty($params['level']) && array_search($params['level'], array('L', 'M', 'Q', 'H')) !== false ? $params['level'] : 'M';

        $urlencoded = urlencode('otpauth://totp/'.$name.'?secret='.$secret.'');
        if (isset($title)) {
            $urlencoded .= urlencode('&issuer='.urlencode($title));
        }

        return 'https://chart.googleapis.com/chart?chs='.$width.'x'.$height.'&chld='.$level.'|0&cht=qr&chl='.$urlencoded.'';
    }

    public function verifyCode($secret, $code, $discrepancy = 1, $currentTimeSlice = null)
    {


        if ($currentTimeSlice === null) {
            $currentTimeSlice = floor(time() / 30);
        }

        if (strlen($code) != 6) {
            return false;
        }


        for ($i = -$discrepancy; $i <= $discrepancy; ++$i) {
           $calculatedCode = $this->getCode($secret, $currentTimeSlice + $i);
       
            if ($this->timingSafeEquals($calculatedCode, $code)) {
                return true;
            }
        }

        return false;
    }


    public function setCodeLength($length)
    {
        $this->length  = $length;

        return $this;
    }


    protected function debase32($secret)
    {
        if (empty($secret)) {
            return '';
        }

        $base32chars =  array(
            'A', 'B', 'C', 'D', 'E', 'F', 'G', 'H', 
            'I', 'J', 'K', 'L', 'M', 'N', 'O', 'P', 
            'Q', 'R', 'S', 'T', 'U', 'V', 'W', 'X', 
            'Y', 'Z', '2', '3', '4', '5', '6', '7', 
            '=',
        );
        $base32charsFlipped = array_flip($base32chars);

        $paddingCharCount = substr_count($secret, $base32chars[32]);
        $allowedValues = array(6, 4, 3, 1, 0);
        if (!in_array($paddingCharCount, $allowedValues)) {
            return false;
        }
        for ($i = 0; $i < 4; ++$i) {
            if ($paddingCharCount == $allowedValues[$i] &&
                substr($secret, -($allowedValues[$i])) != str_repeat($base32chars[32], $allowedValues[$i])) {
                return false;
            }
        }
        $secret = str_replace('=', '', $secret);
        $secret = str_split($secret);
        $binaryString = '';
        for ($i = 0; $i < count($secret); $i = $i + 8) {
            $x = '';
            if (!in_array($secret[$i], $base32chars)) {
                return false;
            }
            for ($j = 0; $j < 8; ++$j) {
                $x .= str_pad(base_convert(@$base32charsFlipped[@$secret[$i + $j]], 10, 2), 5, '0', STR_PAD_LEFT);
            }
            $eightBits = str_split($x, 8);
            for ($z = 0; $z < count($eightBits); ++$z) {
                $binaryString .= (($y = chr(base_convert($eightBits[$z], 2, 10))) || ord($y) == 48) ? $y : '';
            }
        }

        return $binaryString;
    }


    private function timingSafeEquals($safeString, $userString)
    {
        if (function_exists('hash_equals')) {
            return hash_equals($safeString, $userString);
        }
        $safeLen = strlen($safeString);
        $userLen = strlen($userString);

        if ($userLen != $safeLen) {
            return false;
        }

        $result = 0;

        for ($i = 0; $i < $userLen; ++$i) {
            $result |= (ord($safeString[$i]) ^ ord($userString[$i]));
        }
        return $result === 0;
    }

}
?>

2) Next step is making the 2factor authentication scanning barcode section. Just refer above points explained whywe are doing it. Here Iam going to explain how to generate the particular QR code for scanning and saving it in database.

Make a File called authentication.php. you can use any name as your preference. You can also use your own styles.

<?php
require "Authenticator.php";

$Authenticator = new Authenticator();

if (!isset($_SESSION['auth_secret'])) {
    $secret = $Authenticator->generateRandomSecret();
    $_SESSION['auth_secret'] = $secret;
}

$siteusernamestr= "Your Sites Unique String";

$qrCodeUrl = $Authenticator->getQR($siteusernamestr, $_SESSION['auth_secret']);


if (!isset($_SESSION['failed'])) {
    $_SESSION['failed'] = false;
}


?>

Here we are calling the Authenticator class. Then script is generating a random secret code if its not generated and saved in session variable. Then  you have to pass a site unique string. which will be unique for the site and the user. You can use a string concatenate with username or users email for this. Then it is passing to a function to generate QR Code.


3. Include this form down the page. Here its displaying the qrcode to scan and the checkbox to enable authentication. put action page as authenticationsubmit.php

<form class="form-horizontal" role="form" method="post" enctype="multipart/form-data" action="authenticationsubmit.php">

<img style="text-align: center;;" class="img-fluid" src="<?php   echo $qrCodeUrl ?>" alt="Verify this Google Authenticator">

<input  class="ace ace-switch ace-switch-5"  type="checkbox" name="twofa_enable" <?php if($res[0]['twofa_enable']==1){ ?>   checked="true" <?php } ?>>
<span class="lbl">Enable Two factor Authentication</span>

<button class="btn btn-info" type="submit" name="submit">
<i class="ace-icon fa fa-check bigger-110"></i>
Submit

</button>
       </form>


4. In authenticationsubmit.php page, just we have to save the variable values into the database.

<?php

if(isset($_POST["submit"])){
   
$twofaenable=$_POST['twofa_enable'];

if($twofaenable=="on"){
$sfen=1;
}else{
$sfen=0;
}
$id=$_SESSION['loggeduser'];

$auth_secret= $_SESSION['auth_secret'];

$options=array('twofa_enable'=>$sfen,'auth_secret'=>$auth_secret);

$pf = user::byId($id);
 $r=$pf->save($options);

$message    =   new Message('2FA Enabled Successfully','message');
$message->setMessage();         
header('Location:authentication.php?msg=success&id='.$id);


   }
?>

Here You can see the particular script is reading values twofa_enable and from session fetch both users id and auth_secret and will update into database.

Now the enabling part is over..

5) Now next step is verifying 2FA code on Login. For this first step in after login details got submitted. From the script you have to check, whether user has set twofa_enable as 1. If it is 1 , we have to redirect users to verifyauthentication page. If the twofa_enable  is 0, we can direct them to homepage without any verification, since the 2fa is not enabled.


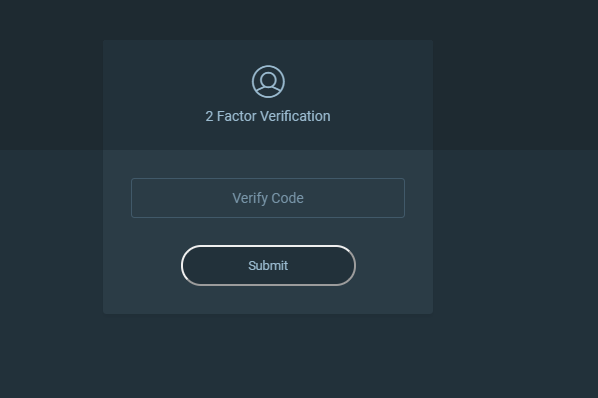
First step is including a form from where to collect the verification code entered by the user.


<form  method="post" enctype="multipart/form-data" action="verifyauthentication.php">
<input class="form-control" type="text" name="code"  placeholder="Verify Code">

<button type="submit" class="btn btn-primary" name="submit">
Submit

</button>
</form>

6) Now user will open their google authenticator app and will put the code in the particular code input text area.
7) Now in our submission script we have to read the code entered and along with the users auth_secret value , using a function it will match the code to the valid code. If its is matching, the script will allow login , otherwise it will redirect to login page again. 

<?php
if(isset($_POST['submit'])){
     session_start();
 require "Authenticator.php";

if ($_SERVER['REQUEST_METHOD'] != "POST") {
    header("location: index.php?error=4");
    die();
}

$id=$_SESSION['loggeduser'];
$obj    =   new User();
$res   =   $obj->getLoggedInfo($id); 
$auth_secret =$res[0]['auth_secret'];

$Authenticator = new Authenticator();
$checkResult = $Authenticator->verifyCode($auth_secret,$_POST['code'], 2);    // 2 = 2*30sec clock tolerance

if (!$checkResult) {
    $_SESSION['failed'] = true;
    header("location: login.php?error=4");
    exit;
} else{

header("Location:home.php");
exit;

}

}


  ?>

Here you can see what the script is doing. Its taking the user id from session and readuing the auth_secret value from the database. Then it is calling verifyCode() method from the Authenticator class passing the code submitted by user and the secret we already saved in db. In script , it will match the code with the calculated code. If both are same, the script will redirect you to inner page otherwise will redirect back to login page.